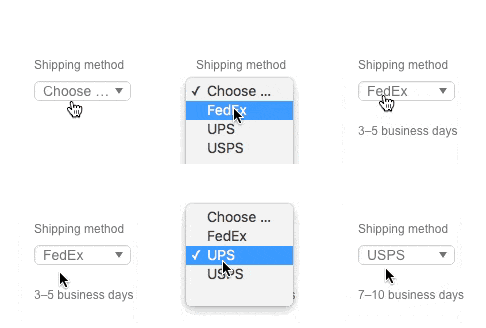
Select lists, also called drop-down menus, are common web form elements that let people choose one item from a set. They’re handy for letting users choose, say, a method of shipping. But with a quick interaction, they can also reveal additional information.
For example, if someone chooses an option for “PayPal” during the checkout phase of an e-commerce flow, the form might display a PayPal login. And if they choose “credit card,” a long number field and short CVV field might appear instead.
Same for shipping. Not every delivery method will take the same number of days. Giving people an estimate will help them choose the best option for their needs.

Building your own options
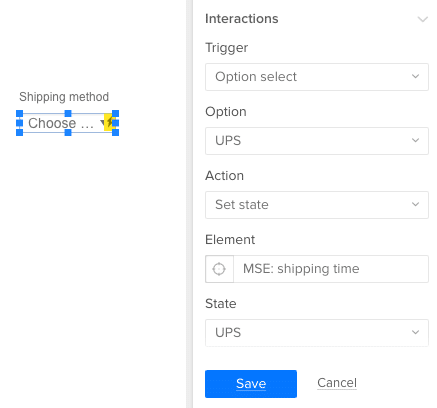
UXPin has a HTML-like select or “drop-down” element — just search for “selectlist”. But it’s a little-known fact that you can create actions based on which item the user selects. You can use this to hide or reveal information and other form elements as required. Here’s how it works.
- Create a multistate element whose states hold the various types of information you want to show.
- Create a select list by searching for “selectlist”.
- Add a new interaction to that select list.
- Trigger: Option select
- Action: Set state

Other ideas
You can apply this to many other use cases depending on what your users want to accomplish. For example:
- How long will it take? The user chooses expedited shipping, and a time estimate appears.
- PayPal or credit card? Make additional fields appear if the user opts to pay with Visa or Mastercard.
- Do you have a promo code? Make a form field appear to accept the discount.
- Shipping overseas? Hide domestic U.S. shipping options if the user’s sending a package to, say, Poland.
Build interactive forms today.


